It’s a fact that garbage disposals are crucial appliances that make our homes a better place. But for you to enjoy their service, proper maintenance and care is a must. One of the biggest problems with disposal units is the leaks. No matter how well they are taken care of, at one point in time leaks will start developing. Don’t get shocked in you find a rapidly growing pool of water while reaching the under-sink cabinet. Note that such leakages are a safety hazard and thus you must fix them soonest possible. Most of these leaks are hard to detect, and it requires precise tests to spot their sources. But you can only identify these sources after having a clear understanding of the garbage disposal unit anatomy.
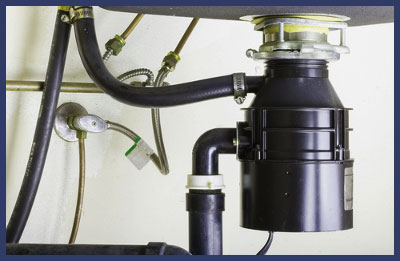
The Anatomy of a Garbage Disposal
First, it is important to note that disposal units come in two types distinguished by the way they are turned on. You can either have the continuous feed model or the batch feed model or both. With the continuous feed model, it comes with a rubber shield at the bottom. This is where the garbage materials are pressed through into the disposal.

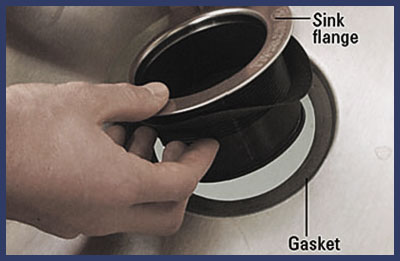
• The sink flange: this part that connects the top part of the disposal to the bottom of the sink drain.
• The dishwasher connection: It’s a rubber hose connecting to the disposal’s side.
• The drain pipe: it is either a plastic or metal pipe that drains food and water away to the sewer.
• The garbage disposal
These are areas that can break, have cracks as well as clogs and this is what makes them susceptible to leaks. They are the main spots to start your scanning.
Identifying Leak Sources
Before you start with the identification of the leak sources, it is important to have the disposal turned off for your safety. The blades inside the disposal unit can cause serious injuries if turned on while repairing. Make sure that the power is cut off completely as a precaution measure.
You can start with leak source identification by testing the system. The first thing you should start with is drying the outside of the sink flange and disposal. This will make it possible to identify new moisture that will build up. Once the outside of the flange is completely dry, turn the water valve on. After some time, you will start seeing the spot where the new moisture is collecting.
With the drain stopper in place, fill the sink with water and give it some time. As you wait, check the disposal under the sink for the leak. If there will be any dripping, the sink flange will be the source of the leak. If it remains dry throughout the entire period, the leak must be coming from the rest parts (drain pipe, dishwasher connections or other parts of the disposal unit). This is how easy it is to identify a leak source.
Fixing/Repair Options

Sink Flange or Putty Problems
Sink flange connects that sink and the disposal unit. If there is a leak from the top, there are high chances that the sink flange or the putty that seals it (in some garbage disposal) is the problem. There are different types of the flanges. The first type is kept in place with screws. In such cases, remove the flange from the unit and check if the bolts are loose. If yes, try to have tightened and then reassemble the unit and the problem will be solved. In the second type, the putty could be the problem. In such cases, you must remove the disposal unit from the sink, take out the worn-out putty and have the flange resealed with new putty. Reassemble the unit and continue enjoying the service.
Cracked, Broken or Loosen Drain Lines
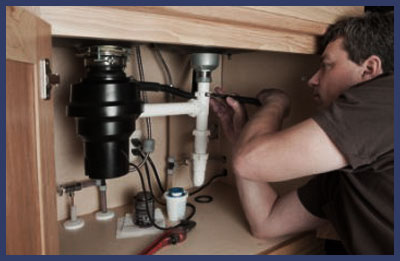
In most cases, drain lines leak the most. For instance, the drain pipe connecting to the sewer is a must for all garbage disposals. There is also another pipe that connects to your dishwasher, but it’s optional. In total, there can be at least two drain pipes in the unit. To identify if one or both of them are the source of the leak, find any loose screws, cracks or other damages. If pipe connecting to the dishwasher is cracked, you can cut it off since they are typically quite long. Unscrew the hose, cut off the cracked end using a utility knife, and then screw it back. If the cracks are all over, you can replace it.
In a case where the leak is coming from loose screws, tighten them to have the problem fixed. For cracked or broken drain pipe connecting to the sewer, replacement is the only way out.
Damaged Gaskets

Repairing the Garbage Disposal
If the leak is coming from the cracks inside the disposal unit, it won’t be easy to fix unless you are an expert. The internal parts of the unit are a bit complicated and very sensitive to tamper with. Otherwise, you might end up destroying it beyond repair. If you are not up to the task, just call a professional plumber to deal with it.


